|
Last time I showed you how to do the St
Petersburg Chain. Now that you have
mastered that stitch, the Double St.
Petersburg Chain should be easy to learn.
*Please note in the illustrations the C bead is drawn as a drop bead, but in
the finished sample I used seed beads instead. You can use either bead.
|
Start by waxing and stretching your thread, use
Nymo D or C-Lon & a #11 or #12 beading needle. Tie in a "stopper"
bead, leaving about an 8" tail and begin at step #1.
Looking for more patterns? Check out my Etsy store!
 |
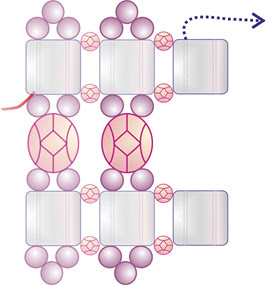
1. Follow the
instructions to make the St
Petersburg Chain Bead stitch pattern. This piece will be
called the Base Section in the future steps.
|
 |
2. Start a new working
thread with a stopper bead and go with working thread up through the 1st
B bead added in the Base Section piece in step #1.
Pick up 6A, go with thread up through the 3rd and 4th A beads just added in this step. |
 |
3.
Pick up 1C, go with thread down through the 4th, 3rd and 2nd A bead,
step #2, up through the B bead in the Base Section, step #3, and the 6th and 5th
A beads, step #2.
|
 |
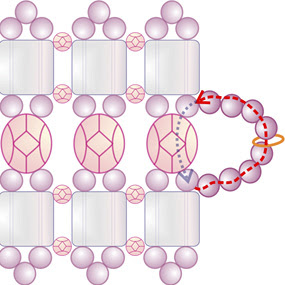
4.
Pick up 4A, go with thread up through the 1st and 2nd A beads just
added in this step. Make sure to pull up thread so that the 1st A bead added
in this step is snug and next to the 5th A bead, step #2.
|
 |
5.
Pick up 1C, go with thread down through the 2nd and 1st A beads, step
#4, up through the 1 B bead, added in the Base Section, step #6 or step #9,
and the 4th and 3rd A beads, step #4.
|

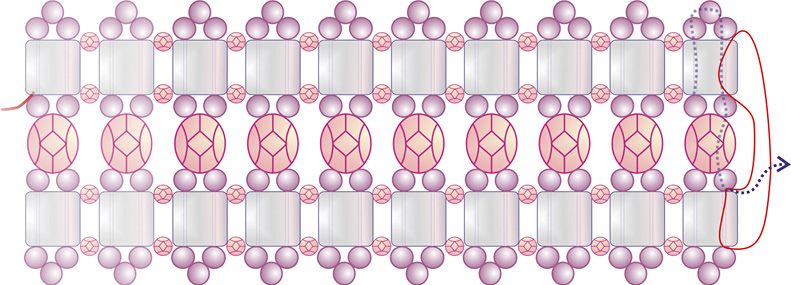
6. Continue by repeating steps #4 and #5 until
you reach the end.
That’s it, Happy Beading!
That’s it, Happy Beading!
Double St.
Petersburg Chain Stitch _ Learn How
http://www.SandraDHalpenny.com
Sandra D. Halpenny 2014 - 2015 All rights reserved
This pattern may not be copied or distributed in any way without the express written permission of the author. The purchaser of this pattern may use the finished piece for personal use and for selling at arts and crafts shows, etc. No mass production of this design is permitted without permission from the author.
 Winter Ice Necklace/Bracelet Pattern
 Princess Hearts Necklace pattern
 Crystal Show Necklace Pattern
More Bead Weaving Patterns